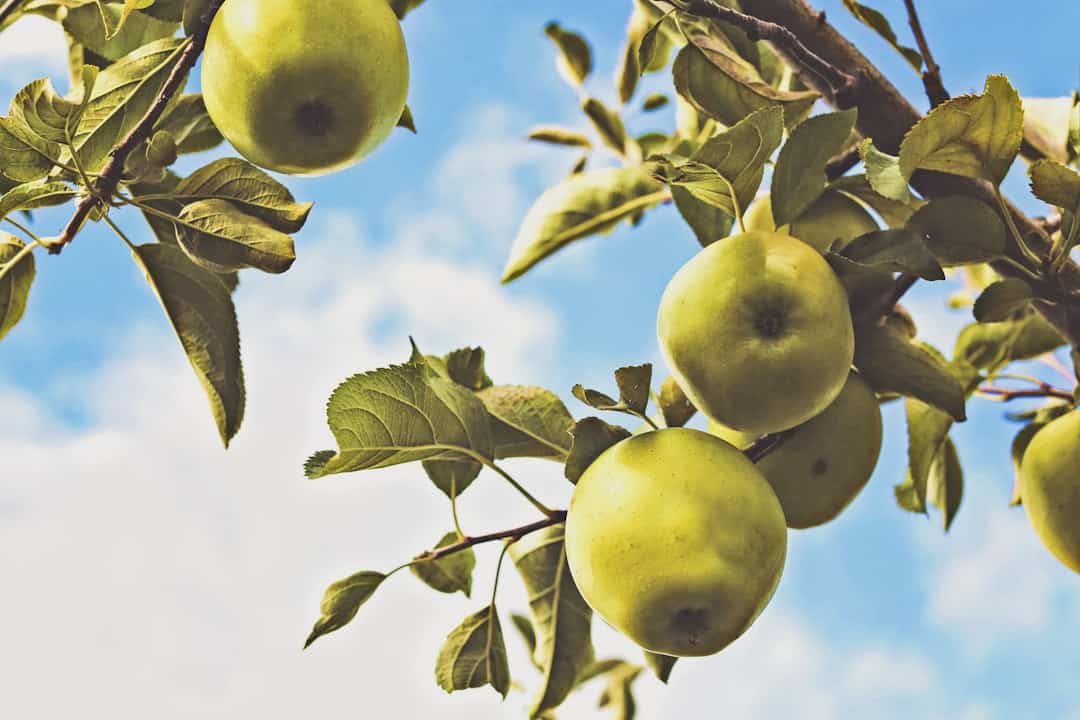
Growing your own pears is a pretty great way to bring fresh fruit into your kitchen and enjoy the satisfaction of raising a tree from scratch.
With enough sunlight, good soil, and a bit of patience, you can have juicy, sweet pears right in your backyard—or even in a big pot.
You don’t need a sprawling yard to get started. Whether you’re new to gardening or just thinking about adding fruit trees, learning how to grow pears is a fun project.

Pears are beginner-friendly and put on a show with spring blossoms before rewarding you with delicious fruit. They fit into home gardens easily, and their gentle flavor is great for eating fresh, baking, or tossing in a salad.
If you love the idea of picking fruit or handing out homemade preserves, a pear tree could be just what your garden is missing.
I still remember planting my first dwarf pear tree at the edge of our garden. It quickly became the star of the yard, drawing in bees every spring and after only 3 years giving us crisp fruit by late summer.
Quick Tips for Pears
Best Time To Plant
Early spring when soil is workable (late winter is ideal in mild areas)
Sun / Lighting
Full sun (at least 6–8 hours daily)
Spacing
15–20 ft (4.5–6 m) between standard trees; 8–10 ft (2.5–3 m) for dwarf
Soil Type / PH
Well-drained loamy soil; pH 6.0–7.5
Container Info
Min. 24–30 in (60–75 cm) wide & deep; 15–20 gal (55–75 L); sturdy pot, good drainage
Propagation
Grafted trees for reliable fruit; growing from seed not true to type and takes longer
Summer-pruning helps keep trees smaller and improves fruit quality—tip from many orchardists.
About Pears

Pears have been grown for ages and are closely related to apples, but they’ve got their own look and taste. Pear trees, known as Pyrus (especially Pyrus communis for European pears), have sweet, mild flesh that’s great for snacking or cooking.
Pear Growth Habits
Pear trees lose their leaves in winter and grow upright with a rounded crown. In spring, you’ll notice clusters of white flowers, which become fruit by late summer or fall, depending on your climate.
Give them full sun and well-drained soil. Pears usually don’t overbear, so you’re less likely to run into problems with exhausted trees.
Most pears need a second compatible variety nearby for pollination and fruit set. So, planting more than one tree usually means bigger harvests.
Compared to apples, pears are a little less fussy about pruning, though they do tend to grow slower, especially if it’s chilly where you live.
You’ll get the best fruit if you water during dry spells and protect the branches from strong winds. Healthy branches mean more pears for you.
Growing Zones for Pears
USA:
- Zones 4–8 as perennials
- In colder areas, choose hardy varieties; in warmer zones, provide water during hot spells
Australia:
- Temperate, cool-temperate, subtropical
- In hot/dry areas, mulch and shade roots; in cooler zones, plant in spring after frosts
Varieties Of Pear

There are two main types for home growers: European pears and Asian pears. Each has its own taste, shape, and kitchen uses.
Here’s a quick look at a few favorites:
Bartlett (European Pear)
Classic pear shape, green skin that turns yellow when ripe.
Juicy, sweet, and melts in your mouth.
Great for eating fresh, canning, and desserts.
Bosc (European Pear)
Long neck, russet-brown skin.
Firm, honey-sweet, and stays crisp even when ripe.
Perfect for baking, poaching, or just eating fresh.
D’Anjou (European Pear)
Short, round, with green or red skin.
Mild, not too sweet, and a bit less juicy.
Toss in salads or snack on them raw.
Shinseiki (Asian Pear)
Round like an apple, yellow-green smooth skin.
Extra crisp, very juicy, and lightly sweet.
Best for fresh eating and lunchboxes.
Seckel (Rare, European Pear)
Tiny, chubby, with a green-yellow skin and red blush.
Super sweet and a little spicy.
Kids love them, and they’re great for preserves.
When picking a pear variety, think about your climate, what you like to eat, and whether you’ve got space for more than one tree.
Some pears need more cold hours in winter to fruit well. Most European pears need another variety nearby to cross-pollinate.
Quick Tips For Variety Selection
Go for a self-fertile variety (like Orient or Seckel) if you only want one tree.
Asian pears are good for hot summers and mild winters—they don’t need as much cold.
For snacking, Asian pears are super crisp and juicy.
If you’re into baking or canning, European types are usually best.
Planting Pears

Pears need the right spot, soil, and timing. Getting these basics right sets you up for a solid harvest.
When To Plant
Plant your pear tree in late winter or early spring, when the soil is workable and before buds open. Bare-root trees should go in while still dormant—spring gives them time to settle in before the heat.
If you’re buying a potted tree, you can plant in early spring or autumn, just steer clear of freezing or scorching days. Spring is usually safest, but in milder areas, autumn works too.
Starting pears from seed is slow and unpredictable, so it’s more for fun than for fruit. Grafted nursery trees are the way to go—they fruit sooner and you know what you’re getting.
Where To Plant
Pick a spot with at least 6–8 hours of sun each day. Well-drained, sandy loam is best, so water doesn’t sit around the roots.
Aim for a soil pH between 6.0 and 7.0. If your soil is heavy clay or drains poorly, plant on a mound or small hill.
Space standard trees about 20 feet (6 meters) apart; dwarf trees need 12–15 feet (3.5–4.5 meters). This gives them room to breathe and makes care easier.
If you’re tight on space, try training your tree as an espalier against a sunny wall or fence. Just make sure it still gets plenty of light and air.
Don’t plant too close to big trees that might shade or steal nutrients.
Container/Small-Space Growing
Dwarf pear trees on dwarfing rootstocks do well in big pots or tubs. Use a container at least 18–24 inches (45–60 cm) wide and deep, with drainage holes.
Go for a light, well-draining potting mix—something with compost and good airflow. No heavy garden dirt.
Put your pot in the sunniest spot you’ve got. Balconies, patios, or decks with full sun work great.
You’ll need to water more often in containers since they dry out faster. Feed your tree every spring with a balanced organic fertilizer.
Repot every few years with fresh soil. Container pears might not give you a bumper crop, but they’re lovely to look at and you’ll still get a handful of fruit.
How To Plant
Soak bare-root pears in water for a few hours before planting to hydrate the roots. Dig a hole twice as wide as the root ball, but not deeper.
Set the tree so the graft union (that bump where the top meets the rootstock) sits just above soil level. Spread the roots out gently, backfill with soil, and pat it down to remove air pockets.
Water deeply right after planting. Mulch with straw or compost, but keep it away from the trunk.
For container trees, plant at the same level as in the nursery pot and water well.
Stake young trees if your area gets windy. Take off any tags or ties that could rub on the bark as the tree grows.
Water weekly, and more often if it’s hot or dry, until the tree is established.
Propagation
Most homegrown pears come from grafted nursery trees. This combines a hardy rootstock (for good roots and size control) with a fruiting top (for tasty, reliable pears).
Grafted pears fruit sooner—often in 3–5 years—and you know what you’re getting.
Growing from seed is slow and unpredictable. Seed-grown pears can take 8–10 years or more to fruit, and you won’t know what the fruit will be like.
If you’re curious, you can try grafting your own pears in late winter or early spring. Whip-and-tongue or cleft grafts are common methods.
Some folks try cuttings, but grafting is much more reliable. For most beginners, just grab a grafted, bare-root tree from a good nursery and you’ll be set.
Care And Maintenance Of Pears

Keeping your pear tree happy mostly comes down to steady watering, a bit of fertilizer, and some regular pruning. These steps help pears produce more fruit and stay healthy.
Watering Needs
Pear trees like deep watering, especially in dry months. Shallow watering makes for weak roots and less fruit.
Water once a week during dry spells, making sure the water reaches about 12–18 inches (30–45 cm) deep.
Mulch helps keep soil moist and cool. Spread 2–3 inches (5–7 cm) of organic mulch—bark or straw work well—around the base, but keep it off the trunk.
Mulch also cuts down on weeds and helps the soil hold water.
If you’re not sure when to water, stick a finger in the soil about a knuckle deep. If it feels dry, it’s time.
Try to avoid soaking the soil for long stretches, since soggy roots can rot.
Fertilizer
Pear trees aren’t heavy feeders, but a yearly boost helps keep them healthy. Spread a slow-release, organic fertilizer in late winter or early spring, just as buds start to swell but before new growth pops up.
Pick an organic fertilizer with an NPK ratio like 10-10-10 or 5-10-10. Compost or well-rotted manure is great too—just spread a 1–2 inch (2.5–5 cm) layer of compost in early spring to feed the soil.
Pruning
Prune your pear tree each winter while it’s dormant, before buds break open. This shapes the tree, lets sunlight reach every branch, and helps fruit grow bigger.
Focus on removing any dead, damaged, or crossing branches. Open up the center so air and light can get in.
Thin out crowded spots, but don’t take off more than a quarter of the canopy in one year. After the tree blooms, pinch off extra small fruits so clusters don’t have more than one or two pears.
Pears Problems And How To Fix Them

Pears are a lovely addition to the garden, but sometimes they run into trouble. Quick action with pests, diseases, or growth issues keeps your trees productive.
Pests
Pear trees often attract insects and animals. Aphids, codling moths, caterpillars, and cherry slugworm all show up on pears from time to time.
Aphids gather on new shoots and make leaves curl or turn sticky. Codling moth larvae burrow into fruit, leaving brown tunnels. Cherry slugworm eats leaves, leaving them skeletonized and sad-looking.
Birds and possums sometimes go after the fruit. Birds peck at developing pears, and possums might eat leaves or fruit overnight—especially in Australia.
Aphids
Symptoms: Clusters of tiny bugs on new shoots, curled or sticky leaves.
Solution: Spray with water or use insecticidal soap. Ladybugs help too.
Codling Moth
Symptoms: Holes and brown trails inside fruit.
Solution: Remove fallen fruit, hang pheromone traps, and bag young pears.
Cherry Slugworm
Symptoms: Skeletonized, burned-looking leaves.
Solution: Dust with wood ash or spray with soapy water.
Birds & Possums
Symptoms: Damaged or missing fruit, chewed leaves.
Solution: Netting or tree guards can help.
Diseases
Leaves and blossoms shrivel and die fast. Pear scab is another problem, leaving dark spots on leaves and fruit—both love humid conditions.
Fire Blight
Symptoms: Black, wilted blossoms or twigs; burned-looking leaves.
Solution: Prune well below infected areas, disinfect pruners between cuts, and avoid heavy nitrogen in spring.
Pear Scab
Symptoms: Olive-black spots on fruit and leaves.
Solution: Clean up fallen debris, prune for airflow, and use an organic fungicide if needed.
Cross-pollinate with compatible pears to boost flower and fruit set. Healthier trees tend to shrug off disease better.
Spot & Fix Plant Problems
If you spot sudden changes, check for pests or disease. Remove affected leaves, boost airflow, and act early for best results.
Growing Problems
Even with good care, pears have their quirks. Pollination matters—a lack of it means few or misshapen fruits.
Small, hard, unsweet pears often come from poor pollination or too many crowded fruits. Not enough water during dry spells or poor soil can slow growth and turn leaves yellow.
Shade or root competition from other trees can also weaken pears and reduce fruit.
Poor Pollination
Symptoms: Few or odd-shaped pears, light harvests.
Solution: Plant two compatible varieties for cross-pollination.
Crowded Fruit
Symptoms: Small, hard pears.
Solution: Thin extra pears when they’re about 1/2–1 inch (1–2.5 cm) across.
Yellow Leaves or Stunted Growth
Symptoms: Yellowing leaves, slow growth.
Solution: Water deeply every week or two, mulch, and feed with organic fertilizer in spring.
Weed and Root Competition
Symptoms: Patchy leaves, poor growth.
Solution: Pull weeds and clear root suckers at the base.
Harvesting Pears

When your pear tree finally produces, timing the harvest makes all the difference. Most pears ripen best off the tree, so picking at the right moment is key.
When To Harvest
Pick pears before they’re fully ripe. Unlike apples, pears get their best flavor after picking and finishing ripening indoors.
Look for a subtle color change—green pears start to turn a bit yellowish when they’re mature. Gently lift and twist a pear upward; if it comes off easily, it’s ready.
The fruit should still feel firm, not soft. Each variety has its own schedule, but late summer to early fall is the general window.
Bartlett pears are picked a little earlier than Bosc or Anjou. If you leave pears too long on the tree, they can turn grainy.
Ripen pears at room temperature (65–75°F or 18–24°C) after harvest. Check them daily—Bartletts ripen in 4–5 days, Bosc and Comice take 5–7, and Anjou might need 7–10 days.
How To Harvest
Handle pears gently to avoid bruises. Cradle each pear in your palm and twist it upward—don’t yank or pull down.
If the pear resists, give it a little longer. Using both hands helps: one for the branch, one for the fruit.
Pick pears in the morning when it’s cooler. Collect them in shallow baskets or picking bags to prevent bruising.
Handle all pears gently after picking; they bruise more easily than apples. Sort as you go—softer or damaged pears should be eaten first or cooked.
Store picked pears at room temperature to ripen, then move them to the fridge after they soften to keep them fresh.
Storing Pears

After harvesting, how you store pears makes a big difference. Since pears ripen off the tree, handling them right is important.
Here are some easy ways to keep pears fresh or preserved:
Cold Storage
Duration: Up to 2 months for winter types
Best For: Fresh eating and cooking
Keep unripe pears in the fridge (32–35°F / 0–2°C).
Check every few days and bring pears to room temperature to ripen.
Freezing
Duration: 6+ months
Best For: Smoothies, baking, sauces
Slice pears, pack in freezer bags, and squeeze out extra air before freezing.
Dry Storage
Duration: Up to a week for summer pears
Best For: Short-term use
Leave pears at room temperature in a cool, dry spot, but use soon. Ripe pears go soft fast.
Plastic Bag in Fridge
Duration: 1–3 months
Best For: Storage pears
Put unripe pears in sealed, unperforated plastic bags and chill to slow ripening.
Preservation Reminders:
• Only refrigerate unripe pears—let them ripen on the counter first.
• Check stored pears often and toss any that get soft or spotty.
• Sprinkle frozen slices with lemon juice to keep them from browning.
Creative Uses And Benefits Of Pears

Pears aren’t just for snacking—they’re surprisingly versatile in the kitchen. They bring gentle sweetness and nutrition to both sweet and savory recipes.
Cooking With Pears
Pears have a mild, fragrant taste that goes well with bold flavors like blue cheese, walnuts, ginger, and cinnamon. Try them fresh in salads for a juicy crunch or roast them with honey for a caramelized treat.
Bake pears with oats and nuts for a quick crisp, or poach them in spiced wine for a soft, comforting dessert. They hold their shape nicely, so they’re great in tarts or pies.
Blend pears into smoothies with spinach and banana for extra nutrition. Grilled pear halves make a surprising side with pork or chicken.
If you’ve got extras, stew pears with a bit of sugar and lemon for a compote to stash in the fridge. It’s handy for snacks or breakfast.
Family Recipes
Adding pears to family recipes is a tasty way to use up your harvest. Plenty of classic dishes come from both the US and Australia.
Classic Pear Crumble
Use up overripe pears; serve warm with vanilla ice cream.
Pear and Blue Cheese Salad
Sweet pears, creamy cheese, and toasted walnuts—hard to beat.
Spiced Pear Chutney
Cook pears with vinegar, ginger, and cloves for a tangy spread.
Australian Pear and Almond Cake
Sliced pears and almond meal make a moist, nutty cake.
Poached Pears in Red Wine
Simple but fancy—cinnamon and citrus add aroma.
Try This: Slice and freeze extra pears in single layers. They’re great in oatmeal or baked goods long after harvest season ends.
Conclusion: Enjoy the Journey

Growing pears takes a bit of patience, but honestly, it’s worth it. Every season brings something different—blossoms, growth, and eventually, that first bite of a homegrown pear.
You’ll pick up new skills along the way, and it’s kind of fun to see your tree change year after year. Each harvest is a little celebration.
Take the time to enjoy the process. Share your pears with friends or family if you can. In the end, it’s about more than just fruit—it’s about the memories, too.
Frequently Asked Questions
Growing pears at home starts with the right seeds or young trees, giving them enough space, and being a little patient. Pear trees grow steadily and can get tall if you let them, though you can prune to keep them manageable for small gardens.
What are the steps to plant pear seeds successfully?
Start by saving seeds from ripe pears. Clean them off and let them dry for a bit.
To get them ready to sprout, you'll need to stratify the seeds. Just wrap them in a damp paper towel, tuck that into a plastic bag, and stash it in the fridge for about 60 to 90 days.
Once that's done, plant each seed about half an inch (1 cm) deep in a seed-starting mix. Keep the soil moist—not soggy—and find a sunny spot for the pot.
When the seedlings are a few inches tall and the last frost has passed, you can move them outdoors.
How much time is needed for a pear tree to start bearing fruit?
Pear trees grown from seed are a long game. Usually, it takes 7 to 10 years (sometimes even longer) before you see any fruit, and what you get might surprise you—it probably won't match the parent tree.
If you go with a grafted pear tree, you'll wait less. Expect fruit in about 3 to 5 years after planting a young grafted tree.
What's the average growth rate for a young pear tree?
A healthy young pear tree typically grows 12 to 24 inches (30 to 60 cm) each year for the first several years.
If the soil's poor, water's scarce, or the tree's sick, growth slows down. Grafted trees often put on height faster than seedlings, which is something to keep in mind.
Can you grow a new pear tree by planting a grocery store pear's seeds?
You can try planting seeds from a grocery store pear, but don't expect a clone of the original. The fruit might end up smaller, harder, or just taste different.
Also, growing from seed means waiting much longer for fruit compared to starting with a young grafted tree. It's a gamble, but sometimes that's half the fun, right?
What maximum height will my pear tree reach, and how can I manage it?
Standard pear trees can get pretty tall—sometimes up to 30 feet (9 meters) if you just let them go wild. Dwarf varieties are much friendlier for smaller spaces, usually topping out around 10 to 15 feet (3 to 4.5 meters).
If you don't want your tree towering over everything, regular winter pruning is the way to go. Pruning not only keeps the height in check, but it also makes picking fruit a whole lot easier and helps the tree stay healthy