Chives are honestly one of the easiest and most satisfying herbs to grow at home. Whether you’re just starting out or want to jazz up your kitchen, they’re a no-brainer.
You can grow chives with barely any fuss—they just need some sun, a bit of water, and a spare patch of dirt or a little pot on your windowsill.
Their gentle onion flavor lifts everything from salads to scrambled eggs. I find them super handy for everyday cooking.

Chives don’t just perk up your food—they’re tough little perennials, coming back year after year. With a few easy steps, you’ll have plenty of greens to snip for garnishing or freezing.
Once you get used to having fresh chives on hand, you’ll probably wonder why you ever bought them from the store.
Quick Tips for Chives
Best Time To Plant
Early spring (after last frost) in temperate zones
Sun / Lighting
Full sun preferred; partial shade tolerated, especially in hot climates
Spacing
8–12 inches (20–30 cm) apart
Soil Type / PH
Rich, well-drained soil; pH 6.0–7.0
Container Info
Yes—choose a pot at least 6 inches (15 cm) deep
Propagation
Seeds, division of clumps, or transplants
The first time I tried growing chives outside, I was honestly shocked at how little they needed from me. By summer, I had more than enough for soups, omelets, and even some for the freezer.
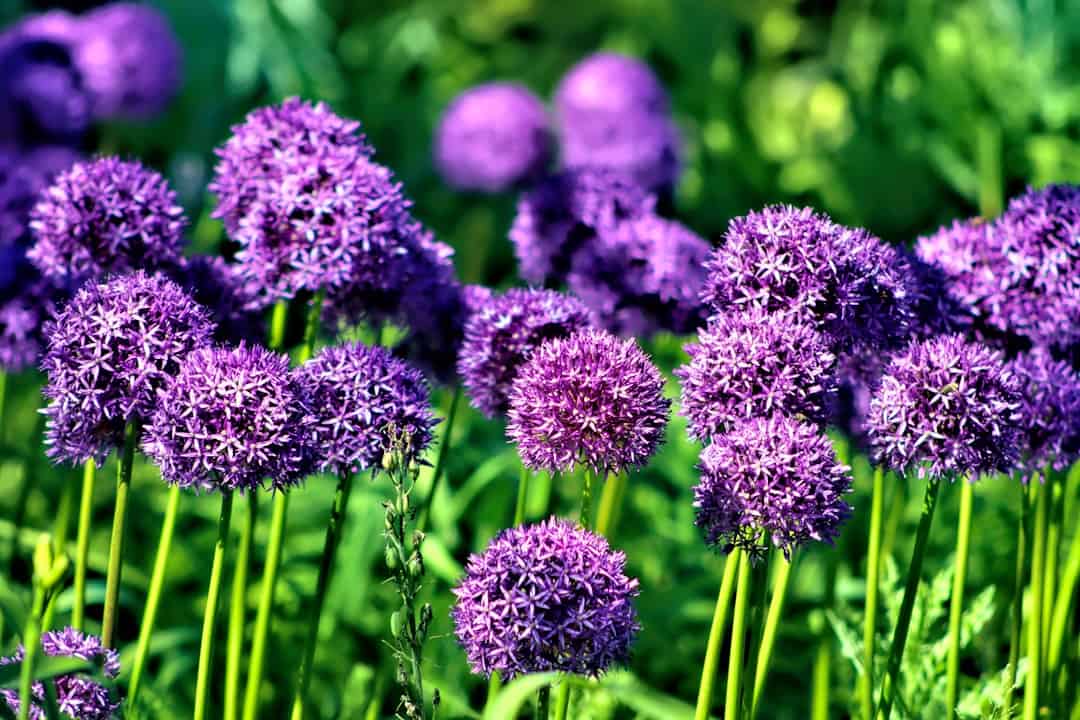
Watching those purple flowers pop up was a bonus—my herb patch looked way more cheerful.
About Chives

Chives are a perennial herb, famous for their mild onion taste and those bright green stems. They bring both color and flavor to your cooking, and the flowers are pretty great for pollinators too.
Chive Growth Habits
Chives are part of the onion family (Allium schoenoprasum). They grow in tight clumps, sprouting up from little bulbs underground.
Since they’re perennials, you’ll get new growth every spring—even if they die back in winter. The leaves are thin, hollow tubes, and you harvest them by snipping a few at a time.
Come late spring or early summer, chives send up round clusters of white or pale purple flowers. Bees love them, and I have to say, they make the garden feel more alive.
Chives aren’t too picky about soil, but they do best in fertile, well-drained earth. The Missouri Botanical Garden says full sun is ideal, but in really hot places, they’ll tolerate a bit of shade.
They can handle light frost and moderate heat.
Growing Zones for Chive
USA:
- Zones 3–10, cool to mild climates.
- Chives are perennial and winter-hardy; mulch in colder zones for extra protection.
Australia:
- Temperate, subtropical, and some arid.
- Plant in autumn or early spring; provide afternoon shade in very hot regions.
Varieties Of Chives

There are a few different chive types, each with its own look and flavor. Picking the right one can make a difference, especially if you’re growing in pots or tight spaces.
Common Chives (Allium schoenoprasum)
Appearance: Slender, hollow, deep green leaves with purple-pink, pom-pom-like flowers.
Flavor: Mild onion flavor, fresh and delicate.
Best Use: Garnishes, salads, soups, egg dishes, and baked potatoes.
Garlic Chives (Allium tuberosum)
Appearance: Flat, broad green leaves with white star-shaped flowers.
Flavor: Mild garlic flavor, slightly stronger than common chives.
Best Use: Asian cuisine, stir-fries, dumplings, and savory pancakes.
Giant Siberian Chives (Allium ledebourianum)
Appearance: Taller and thicker leaves than common chives; larger flower heads.
Flavor: Stronger onion taste, more robust than standard chives.
Best Use: Hearty dishes, soups, and as a bold garnish.
Forescate Chives (Allium schoenoprasum ‘Forescate’)
Appearance: Bright pink to magenta flowers; slightly broader leaves.
Flavor: Similar to common chives, but a bit more robust.
Best Use: Edible flowers for salads and garnishes; attractive in herb gardens.
Hooker Chives (Allium hookeri)
Appearance: Long, flat leaves and small white blooms; can grow up to 2 feet tall.
Flavor: Intense garlic fragrance and flavor.
Best Use: Stir-fries, Asian dishes, and as a flavor-packed herb.
Try mixing a couple of types if you want fresh chives for most of the year, whether you’re gardening outside or in containers.
Variety Selection Tips
Want that classic, all-purpose flavor? Go with common chives.
Cooking a lot of Asian food or craving a garlic note? Try garlic chives.
For unique flowers or colder winters, give Siberian or giant types a shot.
Match your variety to your climate zone for the happiest plants.
Planting Chives

You can start chives from seeds, divisions, or small plants. With the right timing and a good spot, they’ll keep producing for years—even on a balcony or windowsill.
When To Plant
Early spring, right after the last frost, is the sweet spot for planting chives. If you’re impatient, start seeds indoors 6–8 weeks before your last frost date.
Cooler climates do best with indoor sowing in late winter. In milder spots, you can sow directly outside from spring through autumn.
If you’re planting in fall (autumn), stick to mature divisions or starter plants—seeds sown late won’t have enough time to settle in before winter, chives need 8–10 weeks to get well rooted before the cold hits.
Where To Plant
Chives love full sun, but they’ll deal with some shade—especially if you live somewhere hot. Aim for at least six hours of direct sunlight if you can.
They’ll grow in garden beds or raised planters, wherever you’ve got space.
Soil that drains well is key—soggy roots are a no-go. •Avoid spots that stay wet after rain.
You can grow chives in the garden or on a balcony as long as you meet their sun and drainage needs.
Honestly, planting close to the kitchen or a path just makes life easier when you want to grab a handful for dinner.
Container/Small-Space Growing
Chives are made for containers—balconies, patios, or a sunny kitchen window are all fair game.
Use a good potting mix that drains well.
A pot 6–8 inches (15–20 cm) across is enough for a small clump.
Put your pot somewhere sunny. Water regularly, but don’t drown them.
Chives in pots dry out faster than those in the ground, so keep an eye on them. Refresh the potting mix every couple of years for best results.
How To Plant
You can start chives from seed, buy young plants, or split up old clumps.
From seed (direct sow):
• Sow seeds ¼ inch (6 mm) deep, about 2 inches (5 cm) apart.
• As they grow, thin them to 4–6 inches (10–15 cm) apart.
• Water gently—keep the soil moist, not soaked.
Transplanting seedlings:
• Wait until after the last frost.
• Plant at the same depth as the root ball, 4–6 inches (10–15 cm) apart.
• Firm soil around the roots and water well.
Divisions:
• Use mature clumps, at least two years old.
• Gently dig up and split into smaller sections, each with roots.
• Replant right away at the same depth as before.
Chives from seed might take a year to be harvest-ready. Divisions and young plants are faster.
Propagation
Chives are super easy to multiply. There are two main ways: by seed or by splitting up old clumps.
Propagating by seed:
• Collect seeds in late summer after the flowers dry out.
• Store them somewhere cool and dry until you’re ready.
• When you sow, keep the soil moist until the seedlings are settled.
Propagating by division:
• Every 2–3 years, dig up established clumps in early spring or fall.
• Split the root mass into smaller chunks with your hands or a fork.
• Replant each chunk at least 6 inches (15 cm) apart.
Division is the fastest way to make new chive patches—no waiting for seeds to sprout.
Care And Maintenance Of Chives

Chives are tough little herbs. With a few simple habits, you can keep your patch thriving for years.
Watering, feeding, and trimming at the right times will keep the leaves coming in thick and tasty.
Watering Needs
Chives like their soil moist, but not soggy. Water when the top inch (2.5 cm) feels dry.
Usually, they need about 1 inch (2.5 cm) of water weekly, whether from rain or your hose.
Container chives dry out faster, so check soil often. Pots in the sun or wind need extra attention.
Fertilizer
Chives aren’t greedy, but they’ll perk up with a little fertilizer, especially if you harvest a lot. Give them a balanced, all-purpose fertilizer in early spring and again after big trims.
Well-rotted compost or other organic matter works great as a top dressing. Gently scratch about 1/4 cup (60 ml) of compost or slow-release organic fertilizer into the soil around each clump.
Don’t go overboard—too much fertilizer makes leaves floppy and bland. If growth is slow or leaves look pale, a little extra feeding might help, but double-check drainage and sunlight first.
Pruning
Regular trimming keeps chives bushy and stops them from getting scraggly. Use sharp, clean scissors or garden shears, and cut leaves about 1–2 inches (2–5 cm) above the soil.
Cut flower stems back after blooming. That way, the plant focuses on growing more leaves.
Snip off any faded or yellow leaves to keep disease at bay.
Don’t be shy—harvest or prune every few weeks while they’re growing. It keeps the clump tidy and encourages new shoots.
Chive Problems And How To Fix Them

Chives are usually pretty chill, but sometimes pests or diseases sneak in. A quick check now and then helps you catch problems before they get out of hand.
Pests
Chives are generally pest-resistant, but a few bugs can still cause problems, especially in crowded or stressed plants.
Aphids
Symptoms: Clusters of tiny green, black, or white insects on new growth; leaves may curl or feel sticky.
Solution: Spray with a strong jet of water or use insecticidal soap. Encourage ladybugs and lacewings.
Thrips
Symptoms: Silvery streaks, tiny black dots, or distorted leaves.
Solution: Remove affected leaves and use insecticidal soap or neem oil if needed.
Onion Maggots
Symptoms: Wilting, yellowing leaves, and stunted growth; maggots may be found in the roots.
Solution: Rotate crops, use row covers, and remove affected plants.
Check your chives regularly for pests, especially on new shoots and at the base of the plant.
Diseases
Most chive diseases are caused by excess moisture or poor air circulation.
Chive Rust
Symptoms: Small, round, rust-red spots on leaves; leaves may yellow and die back.
Solution: Remove and destroy infected leaves, avoid overhead watering, and ensure good airflow.
Downy Mildew
Symptoms: Yellow patches or fuzzy gray growth on leaves; leaves may wilt or collapse.
Solution: Remove affected leaves, improve air circulation, and avoid wetting foliage.
Root Rot
Symptoms: Yellowing, wilting, or stunted growth; roots may appear brown and mushy.
Solution: Use well-draining soil, avoid overwatering, and remove badly affected plants.
Water chives at the base and space plants well to prevent most fungal problems.
Growing Problems
Whilst chives are easy to grow, but a few issues can slow them down.
Yellow Leaves
Symptoms: Lower leaves turn yellow or pale.
Solution: Check for overwatering or nutrient deficiency; feed with a balanced fertilizer if needed.
Slow Growth or Thin Leaves
Symptoms: Sparse, weak, or thin leaves; little new growth.
Solution: Move to a sunnier spot and divide overcrowded clumps every few years.
Flowering Too Early
Symptoms: Chives send up flower stalks before you’ve had a chance to harvest many leaves.
Solution: Snip off flower buds early to encourage more leafy growth.
For the healthiest chives, give them plenty of sun, well-drained soil, and regular harvesting to keep them vigorous and productive.
Harvesting Chives

Chives are generous—you can pick them several times each season, and they’ll bounce back fast. Regular harvesting means you’ll get fresh, tender leaves from spring through late fall.
When To Harvest
Start cutting chives about 30 days after transplanting or 60 days after sowing seeds. Look for leaves at least 6 inches (15 cm) tall and a nice, bright green.
For the best flavor, pick before flowers open. Keep harvesting through the season. In cool temperate areas (that’s early spring to late fall). In milder spots you might even harvest through winter.
Start when leaves are 6 in (15 cm) tall but always leave at least 2 in (5 cm) at the base so the plant can regrow
How To Harvest
Grab clean, sharp scissors or shears. Hold a bunch of leaves and cut them about 2 inches (5 cm) above the soil.
Just snip what you need, or take bigger handfuls up to three times a season. Regular picking keeps plants healthy and the leaves tender.
Cut away any yellowed or rough-looking leaves while you’re at it. Don’t pull or twist—cutting is gentler on the roots.
Morning harvest keeps the flavor punchy—try to snip before the sun’s too high.
Don’t cut more than half the plant at once. That way, roots stay happy and your chives keep producing all season long.
Storing Chives

Proper storage helps chives keep their vibrant flavor and color, whether you’re using them right away or saving some for later. Here’s how to make the most of your harvest:
Refrigerator Storage
Duration: 1–2 weeks
Best For: Fresh use in salads, garnishes, eggs, and soups
Wrap chives loosely in a damp paper towel and place them inside a plastic bag or airtight container in the fridge. Alternatively, stand stems upright in a glass of water, covered loosely with a plastic bag.
Freezing
Duration: Up to 6 months
Best For: Cooking, soups, stews, and sauces
Chop chives and freeze them in ice cube trays with a little water or olive oil. Once frozen, transfer cubes to a freezer bag for easy, portioned use.
Drying
Duration: 6–12 months
Best For: Long-term storage and seasoning
Cut chives into small pieces and spread them out on a tray or hang bunches upside down in a warm, dry place. Once fully dry, store in an airtight jar away from light and heat.
Properly stored chives mean you’ll always have a pop of fresh, oniony flavor on hand—no matter the season!
Benefits and Uses of Chives

Chives offer more than just a splash of green in your garden.
Their mild onion flavor, edible flowers, and even pest-repelling skills make them practical and honestly, kind of charming to have around.
Cooking With Chives
Chives are versatile in the kitchen and a breeze to prep.
Their subtle onion taste adds a fresh kick to all sorts of dishes.
You can snip chives with scissors right before serving and stir them into scrambled eggs, cottage cheese, soups, or baked potatoes.
They get along well with dairy, potatoes, seafood, and eggs. The RHS suggests using chives raw or tossing them in at the end of cooking since heat can zap their flavor.
The purple chive flowers are edible too, and they look great as a garnish for salads or herbed butter.
Their gentle flavor also blends nicely with sour cream and cream cheese dips.
Family Recipes
Chives are a staple in both US and Australian kitchens. Here are a few quick favorites to inspire you:
Classic Chive and Cream Cheese Spread
Spread on bagels or sandwiches for a fresh bite. Fold minced chives into soft cream cheese, and add a squeeze of lemon.
Potato Salad with Chive Dressing
Toss warm potatoes in a mix of chives, olive oil, and a touch of mustard. A great picnic dish in both countries.
Chive Omelette (Australian Style)
Whisk chopped chives into eggs for a simple breakfast. Add tomatoes or cheese for extra flavor.
Sour Cream and Chive Dip
Mix sour cream with chives and a little garlic powder. Serve with veggie sticks or potato chips.
For a quick garnish, snip chives over buttered toast or grilled fish right before serving for color and flavor. Or try adding fresh chive flowers to vinegar for a mild onion infusion.
Frequently Asked Questions
Chives are flexible herbs you can grow indoors or outdoors in pots, raised beds, or hydroponic systems.
There are a few ways to start new plants or keep your chives healthy, even if you use cuttings or seeds. The answers below cover specific steps and helpful advice to solve uncommon or advanced questions.
What's the best way to start growing chives indoors in pots?
Use a container at least 6 inches (15 cm) deep with drainage holes.
Fill it with a light, rich, well-draining potting mix.
Place in a bright window getting 6–8 hours of sunlight a day—south-facing is best.
Keep the soil moist but not soggy. You can start with seeds, young plants, or by dividing clumps from an existing plant.
Grow lights help if you don't get enough natural light. According to the Royal Horticultural Society (RHS), consistent moisture and good air circulation help prevent fungal issues indoors.
Can you guide me through propagating chives from cuttings?
Chives don't root well from traditional stem cuttings, but you can divide clumps very easily.
Gently dig up an established chive clump in early spring or fall (autumn).
Separate a small section with both roots and leaves using a sharp knife.
Plant the section into a pot or garden bed, and water well.
Dividing chives every 2–3 years will give you the strongest growth.
How can I successfully grow chives from seeds on my windowsill?
Start by filling a seed tray or small pots with a seed-starting or potting mix.
Sow seeds about 1/4 inch (0.5 cm) deep and gently cover.
Keep the soil moist and warm (60–70°F/16–21°C) until seeds sprout, usually in 10–14 days.
Place seedlings in a window with lots of light, or use a grow light.
Thin seedlings until they are about 2 inches (5 cm) apart when large enough.
What are the expected time frames for chives to fully grow?
Chive seeds usually sprout in 10–14 days.
Plants reach a harvestable size in 8–12 weeks (about 2–3 months) from seed when grown in the right indoor or outdoor conditions.
If you plant divisions or young plants, you can start harvesting in about 4 weeks.
Mature chive plants will regrow quickly after each cut, letting you harvest several times a season.
Are there any plants that should not be placed next to chives in the garden?
Chives usually get along with most herbs and veggies.
But it's best not to plant chives right next to beans or peas. A few university extension services have noted these combinations just don’t work out that well.
Chives actually make great neighbors for carrots and tomatoes. Still, give legumes a little breathing room for happier plants.