Growing your own sage is a surprisingly easy way to bring fresh flavor into your kitchen—and a bit of charm to your garden too.
All you really need is plenty of sunlight, well-drained soil, and a little bit of patience.
Sage is great for beginners. It's tough, doesn't ask for much, and you can use it in everything from roasts to herbal teas.

Sage will do well outside in garden beds or tucked into a pot on a sunny windowsill. Even if you don't have much space, you can still grow it.
The leaves smell great and look nice, and they add a real punch to homemade dishes.
Here's a quick guide to get you started, plus a bit about my own experience with this lovely herb.
Quick Tips for Sage
Best Time To Plant
Spring or fall (autumn), after frost risk passes
Sun / Lighting
Full sun; 6–8 hours daily
Spacing
18–24 inches (45–60 cm) between plants
Soil Type / PH
Well-drained, sandy, pH 6.5–7
Container Info
Pots at least 8–10 inches (20–25 cm) wide; ensure bottom drainage holes
Propagation
Seeds, cuttings, or nursery seedlings
Many years back, I started my first sage plant from a friend's cutting. It sat on a sunny windowsill, and I was honestly surprised by how well it grew.
Watching those soft green leaves thrive was pretty satisfying, and it nudged me to try growing other herbs too.
About Sage

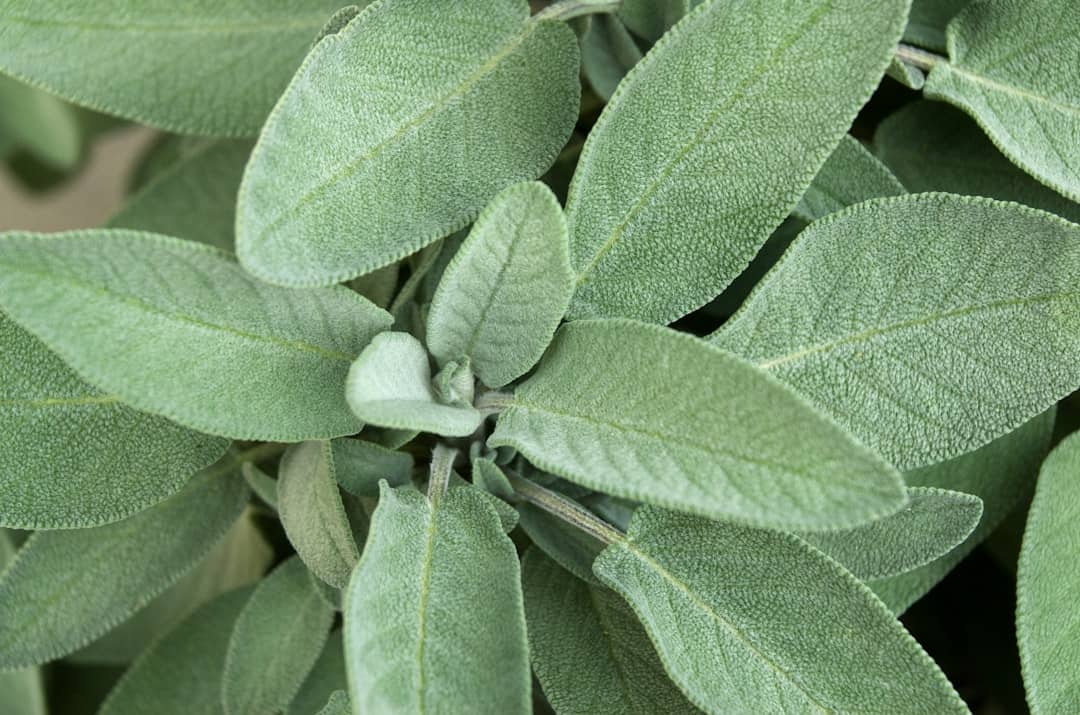
Sage is a fragrant herb with soft, gray-green leaves. It’s got a long history in Mediterranean cooking and traditional medicine.
It adds flavor to lots of dishes and brings pollinators to your garden. As a hardy perennial, it can handle a range of climates.
Sage Growth Habits
Sage is woody and evergreen, sticking around for several years if the climate is right. The stems are sturdy, and the broad, velvety leaves keep their aroma year-round.
The plant forms small, bushy clumps. In late spring or early summer, you’ll notice spikes of purple or blue flowers that bees love.
Sage likes full sun and well-drained, slightly alkaline soil. Those conditions help it grow strong roots and healthy leaves.
Pruning the tips every so often encourages new leaves and makes the plant bushier.
Growing Zones for Sage
USA:
- Zones 5–9, temperate to warm climates.
- Perennial in these zones; mulch in colder areas for winter protection. In zones 4 and below, grow as an annual or bring indoors.
Australia:
- Temperate, Mediterranean, and subtropical.
- Thrives in mild, dry climates; protect from frost and ensure good drainage.
Varieties Of Sage

Sage comes in a bunch of different types. They vary in flavor, color, and what they’re best used for.
Most belong to the Salvia genus, which also includes some ornamental and medicinal plants. Some are mainly for cooking, while others just look good in the garden.
Here are five popular sage varieties. Each one has its own personality, whether you’re after flavor or just want something pretty to look at.
Common Sage (Salvia officinalis)
Appearance: Gray-green, slightly fuzzy leaves; purple-blue flowers.
Flavor: Earthy, savory, and slightly peppery.
Best Use: Classic for stuffing, roasted meats, and Mediterranean dishes.
Purple Sage (Salvia officinalis ‘Purpurascens’)
Appearance: Attractive purple-tinted leaves; compact growth.
Flavor: Similar to common sage, but slightly milder.
Best Use: Ornamental gardens, fresh use, and garnishes.
Golden Sage (Salvia officinalis ‘Icterina’)
Appearance: Variegated yellow and green leaves; compact habit.
Flavor: Milder than common sage.
Best Use: Ornamental borders, container gardens, and fresh use.
Tricolor Sage (Salvia officinalis ‘Tricolor’)
Appearance: Leaves with green, white, and purple variegation.
Flavor: Mild, similar to common sage.
Best Use: Decorative herb gardens, garnishes, and light cooking.
Pineapple Sage (Salvia elegans)
Appearance: Bright green, soft leaves with red tubular flowers.
Flavor: Sweet, fruity, with a hint of pineapple.
Best Use: Teas, fruit salads, desserts, and as a pollinator plant.
Quick Tips for Choosing Sage Varieties
In colder areas, common sage is your best bet.
For colorful leaves, purple or golden sage are fun choices.
Pineapple sage likes it warm and sunny.
Go with common sage if you want that classic flavor in the kitchen.
For pots or small spaces, look for compact types (Golden or Purple)
Planting Sage

Sage is a sun-loving perennial that’s both tasty and pretty forgiving.
You can start it from seed or buy a small plant, but the trick is picking the right time, a sunny, well-drained spot, and planting it properly.
When To Plant
Timing does matter. In most places, the best time to plant sage outside is spring, after the last frost.
This gives the plant time to get established before summer really kicks in.
- If you’re starting seeds indoors, aim for 6–8 weeks before your last expected frost.
- Transplant seedlings or nursery plants outside when frost danger is over and soil is at least 60°F (16°C).
- In areas with mild winters, you can plant potted sage in fall—but skip it if it’s super hot or rainy.
If you live where summers are short, using seedlings or young plants is easier. Sage seeds can be slow to get going, so don’t worry if they take a while. They really do grow slowly at first.
Where To Plant
Sage needs lots of sun and hates soggy roots. Pick a spot that gets at least 6 hours of direct sunlight every day.
- Go for light, well-draining soil or sandy loam.
- If your soil is heavy or stays wet, try a raised bed or mound.
- Keep sage away from downspouts and low spots to avoid root rot.
Neutral to slightly alkaline soil (pH 6.0–7.0) works best. Don’t overdo it with rich fertilizers—sage actually likes leaner soil, and the leaves taste better for it.
Container/Small-Space Growing
Sage is a fantastic choice for pots or tight spaces. As long as it gets sun and drainage, it’ll be happy in a container.
- Use a pot at least 8 inches (20 cm) wide with holes in the bottom.
- Pick a fast-draining potting mix—herb mixes are good, or just add sand to regular soil.
- Set your pot somewhere sunny.
If you’re growing indoors, a south-facing window is ideal. Water deeply but let the soil dry out before watering again.
Containers help keep the roots from getting waterlogged, which sage appreciates.
How To Plant
You can start sage from seeds, plant nursery seedlings, or divide an older plant. The main thing is to give each plant space and make sure water drains away easily.
For seeds: Sow about ¼ inch (6 mm) deep in rows 12–18 inches (30–45 cm) apart. Germination can take 2–3 weeks if it’s warm enough.
For transplants: Dig holes as deep as the root ball, spacing plants at least 18 inches (45 cm) apart.
Water well after planting. Add a light mulch—gravel or coarse sand works—to keep weeds down and the soil surface dry.
If you started seedlings indoors, let them adjust to outdoor light for a few days before planting them in the garden.
Propagation
Sage is easy to multiply—try seeds, cuttings, or division. There’s no one right way, just whatever suits your mood and patience.
Seeds: Good if you don’t mind waiting; some types are slow to sprout.
Stem Cuttings: Snip 4-inch (10 cm) shoots from healthy plants in spring or early summer. Strip off lower leaves, dip in rooting hormone if you have it, and stick them in moist potting mix. They usually root in a couple of weeks.
Division: For older, woody plants—dig them up in spring, split with a spade, and replant the best bits.
Cuttings are a nice shortcut if you already have a vigorous sage plant you love. No matter how you start new plants, keep young divisions or cuttings out of hot sun until they’ve got roots.
Care And Maintenance Of Sage

Sage doesn’t need much fuss once it’s settled in, but a little attention goes a long way. Watering, a bit of feeding, and some seasonal pruning will keep your plants healthy.
Watering Needs
Sage likes to dry out between waterings, so don’t drown it. Soggy soil can mean root rot or mildew—nobody wants that.
Let the top 1–2 inches (2.5–5 cm) of soil dry before watering again. Usually, that means watering once a week in warm weather, and even less when it’s cool.
If the leaves turn yellow, you’re probably watering too much. Sage can handle dry spells once it’s established, though if drought drags on, growth might slow down.
A bit of mulch or compost around the base helps keep soil moisture steady without getting waterlogged.
Try grouping sage with other drought-loving herbs like rosemary. Makes watering easier, honestly.
Fertilizer
Sage isn’t a heavy feeder. It actually prefers modestly fertile soil.
Too much fertilizer can dull the flavor and make the plant leggy. Apply a light dressing of well-rotted compost in early spring.
This refreshes the soil and gives your sage a gentle nudge. Spread 1–2 inches (2.5–5 cm) of compost around the base, but don’t let it touch the stems.
Skip high-nitrogen fertilizers—they tend to make sage weak and floppy. If your plant looks pale or sluggish, a single dose of balanced organic fertilizer (like 5-5-5 NPK) can help.
Container-grown sage is a bit needier. Feed lightly every 6–8 weeks with diluted liquid organic fertilizer, but don’t go overboard.
Top-dress with compost in fall to set your sage up for next season.
Pruning
Regular pruning keeps sage bushy and prevents it from getting too woody in the center. Early spring is the best time to prune, right as new growth appears.
Take off up to one-third of the plant, focusing on older, woody stems. Use clean, sharp scissors or garden shears.
Always snip just above a set of leaves. Remove any dead, damaged, or diseased branches whenever you spot them.
In summer, light pruning encourages fresh, tender leaves for cooking. After flowering, tidy up the shape, but don’t cut deep into bare wood—it might not bounce back.
Try shaping sage into a low, informal hedge. Regular trims keep it neat and give you more tender leaves.
Sage Problems And How To Fix Them

Sage is pretty easygoing, but sometimes pests, diseases, or growth hiccups show up. With a bit of attention, you can usually keep things under control.
Pests
Sage is fairly pest-resistant, but a few insects can still cause trouble, especially on stressed or overcrowded plants.
Aphids
Symptoms: Clusters of tiny green, black, or white insects on new growth; leaves may curl or feel sticky.
Solution: Spray with a strong jet of water or use insecticidal soap. Encourage beneficial insects like ladybugs.
Spider Mites
Symptoms: Fine webbing, yellow speckles, or dry, stippled leaves—especially in hot, dry weather.
Solution: Increase humidity, rinse leaves, and use insecticidal soap if needed.
Slugs and Snails
Symptoms: Irregular holes in leaves, slimy trails on foliage or soil.
Solution: Hand-pick at night, use barriers or traps, and keep the area around plants tidy.
Green Caterpillars (e.g., cabbage loopers, cutworms) - these are my bug bear!
Symptoms: Ragged holes or chewed edges on leaves; you may spot small green caterpillars on the undersides of leaves.
Solution: Hand-pick caterpillars when you see them (morning and evening are best times). You can also use organic controls like Bacillus thuringiensis (Bt), which specifically targets caterpillars without harming beneficial insects.
Check your sage regularly, especially on the undersides of leaves and around the base.
Diseases
Most sage diseases are related to excess moisture, poor air circulation, or overcrowding.
Powdery Mildew
Symptoms: White, powdery coating on leaves and stems.
Solution: Improve air circulation, avoid overhead watering, and remove infected leaves.
Root Rot
Symptoms: Wilting, yellowing leaves, and mushy, brown roots; plants may collapse suddenly.
Solution: Ensure well-draining soil, avoid overwatering, and remove severely affected plants.
Downy Mildew
Symptoms: Yellow or brown patches on leaves, sometimes with fuzzy growth underneath.
Solution: Remove affected leaves, improve airflow, and water at the base of the plant.
Water sage at the base and give plants plenty of space to prevent most fungal issues.
Growing Problems
Sage is generally easy to grow, but a few environmental issues can slow it down.
Leggy or Sparse Growth
Symptoms: Long, weak stems with fewer leaves.
Solution: Move to a sunnier spot—sage needs at least 6 hours of direct sunlight. Pinch back tips to encourage bushiness.
Yellow Leaves
Symptoms: Lower leaves turn yellow or drop off.
Solution: Check for overwatering or poor drainage; sage prefers to dry out between waterings.
Lack of Flavor
Symptoms: Leaves taste bland or weak.
Solution: Grow sage in full sun and harvest just before flowering for the best flavor.
For the healthiest sage, provide full sun, well-drained soil, and regular pruning to keep plants vigorous and flavorful.
Harvesting Sage

Sage is ready for harvest when the plant’s leafy stems look full and the leaves are bright and healthy. Timing matters for flavor and for keeping your plant in good shape.
When To Harvest
The best moment is right before sage starts to flower. That’s when the oils are strongest and the flavor is at its peak.
In most areas, this happens from late spring to early summer. For new plants, only pick a few leaves in the first year—let them get established.
Once your sage is settled, you can harvest more often. Pick leaves or stems in the morning after the dew dries for the best taste.
Take no more than a third of the plant at once. That way, it keeps growing and producing for you.
How To Harvest
Use clean, sharp scissors or snips. Cut individual leaves or small stems, but don’t chop into the old, woody parts.
This helps the plant bounce back and keeps it looking good. Select green, healthy leaves or soft stems and cut just above a set of leaves or a joint.
Never take more than a third at a time. Bundle short stems for drying, or pick leaves as you need them for the kitchen.
Remove any damaged or yellow leaves while you’re at it. Regular harvesting encourages bushier growth and more tender new leaves.
Morning Harvest Tip: Go out in the morning for the most flavorful sage—the oil content is highest then.
Storing Sage

Proper storage helps sage keep its earthy aroma and savory flavor, whether you’re using it fresh or saving some for later. Here’s how to make the most of your harvest:
Refrigerator Storage
Duration: 1–2 weeks
Best For: Fresh use in roasts, stuffings, and sauces
Wrap sage sprigs in a damp paper towel and place them in a plastic bag or airtight container in the fridge. Alternatively, stand the stems upright in a glass of water, loosely covered with a plastic bag.
Freezing
Duration: Up to 6 months
Best For: Cooking, soups, stews, and baked dishes
Chop sage leaves and freeze them in ice cube trays with a little water or olive oil. Once frozen, transfer cubes to a freezer bag for easy use.
Drying
Duration: 6–12 months
Best For: Long-term storage and seasoning blends
Tie sage stems into small bunches and hang them upside down in a warm, dry place until the leaves are crisp. Store dried sage in an airtight jar away from light and heat.
Properly stored sage means you’ll always have that classic, comforting flavor ready for your favorite dishes, all year round
Benefits and Uses of Sage

Sage does more than just look pretty in the garden. Its unique flavor and versatility add something special to your meals and even some old family traditions.
Cooking With Sage
Fresh sage packs a strong, earthy punch. It’s perfect with poultry, pork, or roasted veggies.
Think turkey stuffing—that deep, aromatic note is classic for the holidays. Sauté sage in olive oil and you get crisp, fragrant leaves, great for topping pasta, soups, or even fried chicken.
Chop fresh sage to stir into butter or sprinkle over roasted potatoes. Dried sage hangs onto its flavor and is easy to store for later.
Add fresh sage to tomato sauce or blend it with lemon and garlic for a bright chicken marinade. It also teams up nicely with thyme, rosemary, or parsley for a more complex herb mix.
Store whole leaves in the fridge wrapped loosely in paper towel, or dry and keep them in a jar for months.
Family Recipes
Some sage recipes just never get old. Here are a few to try with your homegrown stash:
Traditional Turkey Stuffing
Bread cubes, sautéed onion and celery, lots of fresh sage, and broth. Bakes up golden and savory.
Sage Butter Pasta
Melt butter with sliced sage for a quick, flavorful pasta sauce. A sprinkle of parmesan on top is a must.
Crispy Fried Sage Leaves
Dip in a light batter or fry plain in olive oil. Sprinkle with sea salt for a crunchy snack or salad topper.
Pumpkin and Sage Risotto
Stir chopped sage into creamy risotto with roasted pumpkin for a cozy autumn meal.
Sage and Onion Roast Chicken
Tuck sage and onion under the skin or inside the bird before roasting for extra aroma and flavor.
Veal Saltimbocca! This beloved Roman recipe features tender veal cutlets topped with fresh sage leaves and wrapped in salty prosciutto, then pan-fried until golden and flavorful (my absolute favouriate)
Frequently Asked Questions
Sage is pretty easy to care for after you’ve set up the basics. With a little attention to watering, light, and the occasional trim, your indoor sage should keep producing tasty leaves most of the year.
What are the ideal conditions for growing sage indoors?
Sage needs plenty of sunlight, so stick your pot in a south-facing window that gets at least six hours of direct sun. Use sandy, well-draining soil and make sure your pot has drainage holes.
Keep the room between 65–75°F (18–24°C). Good air flow helps prevent mildew, so don’t crowd your plant.
Can you guide me through the process of growing sage from cuttings?
Snip a 4–6 inch (10–15 cm) cutting from a healthy stem that isn’t flowering. Remove the lower leaves and, if you have it, dip the cut end in rooting hormone.
Stick the cutting in moist, well-draining soil or just water. Keep it somewhere warm and bright, but out of direct sun. Roots usually show up in two to four weeks. Once they’re about an inch (2.5 cm) long, move the cutting to a bigger pot.
What are the steps to propagate sage from seed successfully?
Sow sage seeds indoors about 1/8 inch (3 mm) deep in a seed-starting mix. Keep the soil damp, but not soggy.
Seeds tend to sprout in two or three weeks at 60–70°F (16–21°C). Once you see a few true leaves and the seedlings look sturdy, transplant them to their own pots. Thin out the weaker ones so the strongest can grow.
How do I use fresh sage in cooking, and can I substitute it for dried sage in recipes
Fresh sage has a stronger, brighter flavor than dried, so it’s great for stuffing, roasts, pasta, and even butter sauces.
To use fresh sage instead of dried, use about three times as much—so if a recipe calls for 1 teaspoon dried sage, use 1 tablespoon chopped fresh sage.
Add fresh sage toward the end of cooking to preserve its aroma, while dried sage can be added earlier to let its flavor infuse the dish.